Lady is very consistent and predictable. Which is exactly the way she wants her food to be. So, new foods are a challenge. Any transition or change for an autistic is a challenge. Heck, I can be pretty challenged myself by new situations! So, no one is alone in trying to cope with change.
But as far as food goes, I found a trick to get her to attempt new tastes. I learned this from my friend, Michelle, whose son is also on the spectrum. Bless you, Michelle, for sharing this with me.
Take broccoli. This is a true story. We put broccoli on her plate every night for a month. Not the same piece, sheesh. But at first, she squawked about even looking at the broccoli. So we said she just had to keep in on her plate for now. A few days of that, then we made her just touch the broccoli on her plate every night. Some more days and now she has to pick up the broccoli and touch it to her lips. Don't taste it! Just to the lips. You see the pattern, just a few days of the same action until she is comfortable with that action, then move her forward. A few days of lips, then a few days of tasting it with her tongue and spitting it back on her plate. When the month was done, she was able to chew it and keep it in her mouth. We are still working on swallowing, though. She'll chew that same piece of broccoli for a half hour sometimes. Just swallow, Lady! She eventually gets past it and it goes down the hatch. But it is still a struggle for her.
This technique of getting used to the food has come in really handy. Just last week, mushrooms. "Mom! I like mushrooms!" And last night, "Mom, I like pineapple!" A whole new world of flavor (and nutrition) is gradually showing up in my Lady's life. Predictability is still her thing, though. I know that if I serve vanilla ice cream with rainbow sprinkles forever and ever, I will be the winner forever and ever. Some things will probably never change. And in some ways, I hope they never do.
Tuesday, March 1, 2011
Wednesday, January 26, 2011
Magic hands
This post is another autism help. But the funny thing about autism helps is that they help so many neurotypical people as well as autistics.
I learned this trick from an occupational therapist out in Baltimore. Sadly, I can't remember her name. I only met her a few times. But I owe her this one!
When Lady gets frustrated or has to sit for long periods of time, I take her hand and start to massage her cuticles very lightly. I apply light pressure to the fingernail, mostly. I do that to each finger very slowly. Sometimes I lightly pull at the fingernail and draw my hand up and away from her hand and then flick my hand like I'm setting something free or flicking something away. I pretend with her that this pulls out the negative feelings from her fingers. All those frustrations get pulled out of her fingernails and her head and sent on their way up to the sky.
She doesn't like her thumbs to have the pressure. Don't know why, but I can be flexible. We don't do thumbs. I also will sometimes rub her fingers and palm very gently, or tap my fingernails on her palm. She calms down within seconds.
I've tried this on many children, both neurotypical as well as special needs. It works on all of them. Just on Sunday, a little 4 year old boy sitting behind me in church was pulling my hair, trying to get my attention. He was bored. Don't blame him. It's church. I taught him last year in his Sunday school class, so I knew him well. I finally grabbed his hand when he pulled my hair again. He tried to yank away, but I held on with a smile, and began massaging his fingernails. Talk about melting! Within two fingers-time, his head was resting on my chair-back and his hand was dangling in front of my face, completely cooperative. He calmed down almost instantly. When I finished, he was giggling because my finger-tapping on his palm tickled. I let go of his hand and went back to listening. Within seconds, he was gently shaking his hand in front of my face. Wanting more?
I did this same thing with a boy in Lady's class on Friday. He is neurotypical, just as the 4 year old I just told you about. He was having a rough morning and had already been sent away from carpet to put his head on his desk. (That means he's pushed it too far.) He usually is a very cooperative boy, so this surprised me. I sat down next to him and whispered, "So, you're having a rough morning?" He didn't look at me but his eyes were wet and red. I said, "Can I show you something I do when I'm frustrated?" He nodded, so I took his hand and began pulling out the bad feelings. 5 minutes later, not kidding!, he was smiling at me and laughing when I flicked away the feelings to the sky. 5 minutes more and he was participating in the group discussion from his desk, completely engaged with the teacher.
I tell you, it's magic. Try it sometime. The child probably won't trust you at first. They will think they are getting in trouble. But when they realize you are only there to listen and rub their hands, emotions change pretty quickly. It's amazing.
Thursday, December 23, 2010
Snowball Emergency Kit and Tree Skirt
Can you tell life has calmed down a bit? I finished the sprint to Christmas and now have time to post a few things. I'm also stuck in take-out boxes. For a few neighbor gifts I made more divinity, rolled it into balls and then made snowball emergency kits like this one.


The sticker label across the tops says: "Snowball Emergency Kit:
We're dreaming of a white Christmas, but in case it isn't white;
These little baby snowballs are ready for the fight!
Hope your Christmas is heavenly and that you enjoy this snowball divinity!" Then I attached a more religious message with a bow on top. Take-out boxes are so much fun.

I also needed a tree skirt. Since we moved, we couldn't find the one my MIL made me about 10 years ago that we have used every year. We have searched every Christmas bin and still no luck. I swear, we always lose things when we move! I still can't find my silicone hot pad that I lost 5 years ago in our move to the East Coast. I'm still a little sore about that. But, anyway, I digress. Tree Skirt: We got this ginormous tree this year! (Never doing that again!) Since we couldn't find our traditional tree skirt, we had a tarp wrapped around the base. UGLY! So, I bought a little one from Target. Now, my allegiance to Target remains steady, but the little tree skirt just wasn't big enough. It was 48" diameter and solid red, and just NOT big enough for this tower of a tree. Seriously, I think it's 17 feet tall. It touches the vault. I digress again.

So, being unhappy with the little red tree skirt that couldn't, I thought bigger. And I see potential in things beyond what they're intended for. I didn't want to spend $50 on a big tree skirt, so I found a round tablecloth instead. $15 and a pair of scissors later, this is what we have!

I cut a slit down the back and a circle in the middle, hemmed the edges and wrapped it around the trunk! Took a whole 20 minutes. And the tablecloth was 70" in diameter, so quite a bit bigger.
I must also say that I like the print of the tablecloth-turned-tree skirt. It has the 12 days of Christmas printed around the edges and a great round red border. Made it easy to cut the circle out of the middle.
 So until we find the tree skirt of yore, this one will fit the bill. Happy Christmas!
Tuesday, December 14, 2010
Fortune Cookies! And Divinity. Remember that?
 |
For teacher gifts this year, I dipped fortune cookies in chocolate. Made a ton, and really fun. I had 11 teacher gifts to make this year. Why, you ask? Because my Lady has a whole crew of wonderful people who support and teach her. And I wanted to thank them because they put a lot of effort into helping my Lady progress. |
 |
| This is my double boiler. A pyrex on a pot. Medium low heat, 2 inches of water in the pot, make sure glass doesn't touch the water. Simmer. Chocolate melts as you stir it, and don't cook it too long, because chocolate will change it's consistency permanently if heated too long. We found that out the hard way. |
 |
| Then we dipped them in candy sprinkles! Aren't they cute? |

 |
| Put them in take-out boxes that I got from that same restaurant supply store. |
 |
| Then tied these tags on that say: "We feel so FORTUNATE to know you! Thanks for all you do! All the Merriest!" Hope our Teachers like them. |
 |
| And this is random, but I made divinity for a cookie party I went to last week. I hadn't seen divinity is probably 20 years. But I remember my mom making it in her big Bosch mixer (you know, the never-say-die mixers that can keep on trucking through an atomic bomb!). My Kitchenaid had to do for this one, but it was a rough task for my machine. (Wishing I had the Bosch right about now.) Seriously, the motor on my Kitchenaid was HOT from all the beating. Anyway, the divinity still turned out wonderful, in spite of a hot mixer and a cloudy, very cloudy, overcast, did-I-mention-foggy?, day. I'd forgotten how DIVINE this confection is. And I introduced a whole new generation to the treat of the gods. (My kids got to lick the bowl and beater. Happiness on a spoon!) Very sweet and heavenly. The treat truly lives up to it's name. |
Here's the recipe:
Perfect Divinity:
- 2 cups sugar
- 1/2 cup light corn syrup
- 1/2 cup hot water
- 1/4 teaspoon salt
- 2 egg whites
- 1 teaspoon vanilla
- 1/2 cup chopped pecans (totally optional!)
Directions:
Prep Time: 15 mins
Total Time: 35 mins
1Line 2 cookie sheets with wax paper, and butter the wax paper. Set aside. In a 2 quart saucepan combine sugar, corn syrup, water, and salt.
2Cook, stirring, till sugar dissolves. Wash sides ofof pan with a brush dipped in water to remove any sugar crystals. Boil, without stirring, until mixture registers 260 degrees on candy thermometer. This makes the syrup.
3Meanwhile, as temperature of syrup reaches 260 degrees, beat egg whites on high speed till stiff peaks form, at least 5 minutes.- 4When syrup reaches 260 degrees, very gradually add the syrup to egg whites, beating at high speed with electric mixer.
- 5Add vanilla and beat until candy holds its shape and begins to lose its gloss, about 4-5 minutes.
- 6Stir in the chopped nuts, if desired.
- 7Quickly (work very fast!) drop candy from a buttered teaspoon onto buttered waxed paper, swirling the top of each piece.
- 8Let cool. Yield about 1 1/2 lbs.
Thursday, September 16, 2010
Letter Tracing
Many of you know Lady is autistic. At the suggestion of my mother, I am going to start including things that help us cope and work through raising a child with autism.
And this is my first post. Lady struggles with fine motor dexterity. This morning we were trying to trace letters and she was about to melt down. So, what I did was using my fingernail, I gently traced the letter on her left arm as she was tracing it with her right hand on the paper. She would follow my pattern, so she formed the letters correctly, but I wouldn't begin until she started moving the pencil on the paper. She needed that sensory motivation to complete the assignment. I also would use the pad of my finger as if it were a pencil eraser and rub her arm over the spot where I just traced the letter so we could start a new letter. I also did that if she erased on her paper. She responded beautifully. We have some great looking pages of A's, B's, and C's.
And this is my first post. Lady struggles with fine motor dexterity. This morning we were trying to trace letters and she was about to melt down. So, what I did was using my fingernail, I gently traced the letter on her left arm as she was tracing it with her right hand on the paper. She would follow my pattern, so she formed the letters correctly, but I wouldn't begin until she started moving the pencil on the paper. She needed that sensory motivation to complete the assignment. I also would use the pad of my finger as if it were a pencil eraser and rub her arm over the spot where I just traced the letter so we could start a new letter. I also did that if she erased on her paper. She responded beautifully. We have some great looking pages of A's, B's, and C's.
Wednesday, September 1, 2010
Headboard: Anthropologie attempt
 So I saw a wall about 4 years ago in an Anthropologie store back east. I fell in love. My mom came to visit me this week, and we needed a project. I had this one stewing for about four years and we thought we'd take on the challenge. And, true to form, it was a challenge, with many layers of work to complete the project. What were we thinking!?! We were attempting to recreate the Anthro wall, but modify it to match the bird painting I love.
 We started with this frame. 2x12x8 foot boards, but in half so they were four feet long. We had B screw 2x4's into the back for the legs and to hold up the 2x8's.
 Then we tried this wonderful technique for aging wood. We soaked steel wool in vinegar for at least 4 hours, added some (about a cup) water after they soaked, then scrubbed the boards with the steel wool.
 This is how it turned out.
 Then we took my favorite wrapping paper, spray adhesived it to the wood, put a water color of brown over it, let it dry. It wrinkled the paper and I loved the texture it added. After it dried, we dry-brushed cream paint over the black flowers to tone them down. Let it dry, then sealed the paper with clear, satin polyurethane.
 This made the paper curl some, but the texture was great, so I just nailed down the edges of the paper that curled.
 Next, we took muslin and silk and ripped it into 4 and six inch strips. We had to use Rit dye for the teal/aqua color on some of the muslin because I couldn't find that color. The natural muslin was left alone because it's texture was a little rougher than the muslin we used to dye. The silk was stuff I already had.
 And a project isn't a project until the hot glue comes out! My SIL called it the crafter's power tool. Too true. And you can't truly due a project until you get burned by the glue gun, too! Anyway, enough about the glue gun. I cut out three cardboard circles, small, medium, and large. We hot glued the fabric strips around the outside edge first, then filling in the middle, pinching the fabric to make the gathers. Confusing? Sorry.
 We placed the fabric flowers, and then I used green mesh floral wrap for leaves. I cut long strips of it, wrapped the center with floral wire, then stapled the flowers and leaves to the wood in whatever fashion.
 My blessed B screwed in the 2x4's into the bed frame, and my good boy helped hold up the beastly headboard. Man, it was heavy! It took about 20 minutes to move it from the garage to the bedroom just because I had to keep resting!

Pretty close to the painting! And now I really need new bedding!

Monday, August 30, 2010
Birdhouse, Night light and Lady's room
I've got a thing for trees. I love them. I just do. I can't help myself. In our house back east, I painted a tree in my kids' room in the corner, floor to ceiling, and on the ceiling. I seem to still want that. So, since we moved into a rental and I can't paint the wall, I made a tree out of cardboard. You can see parts of it behind the night light. The night light was a lot of fun. It hangs above her bed and has LED Christmas lights in it. The lights don't get hot, they save energy, and they're blue! So, it almost looks like a moon or fireflies caught in the japanese lantern. I also had this awesome sunflower that is seriously 4 feet across. It hung above the stairs back east, and it's just so happy I had to find a place for it here.
 The room is still in progress, probably always will be.
 Entry to the room.
 Pretty good shot of most of the room. At least the tree, bed and book house. Remember the pvc house we built last time? Well, Lady wouldn't allow us to break it down, so we had to move it to her bedroom. It sits between her bed and bookshelf (that we built this spring and posted about that a while ago.) We left one side open to the books, filled it with pillows, and she decorated it like Christmas. She loves it.
 I also made this birdhouse for her tree and thought I'd include instructions because it's made from recycled stuff and I love that. I took a cereal box and a granola bar box and a paper bag.
 I cut the granola bar box in half,
 Taped it to fit in it's corners so it would be pitched like a roof. I covered all the boxes in the brown bag paper.
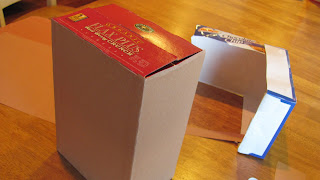 Hot glued the roof to the cereal box, hot glued felt cut-outs on the box, stuck a pencil in the bottom and cut out a hole for the bird to go in.
 Home, tweet home.
 The night light was a lot of fun. It hangs above her bed and has LED Christmas lights in it. The lights don't get hot, they save energy, and they're blue! So, it almost looks like a moon or fireflies caught in the japanese lantern. I also had this awesome sunflower that is seriously 4 feet across. It hung above the stairs back east, and it's just so happy I had to find a place for it here.
 The room is still in progress, probably always will be.
 Entry to the room.
 Pretty good shot of most of the room. At least the tree, bed and book house. Remember the pvc house we built last time? Well, Lady wouldn't allow us to break it down, so we had to move it to her bedroom. It sits between her bed and bookshelf (that we built this spring and posted about that a while ago.) We left one side open to the books, filled it with pillows, and she decorated it like Christmas. She loves it.I also made this birdhouse for her tree and thought I'd include instructions because it's made from recycled stuff and I love that. I took a cereal box and a granola bar box and a paper bag.I cut the granola bar box in half,Taped it to fit in it's corners so it would be pitched like a roof. I covered all the boxes in the brown bag paper.Hot glued the roof to the cereal box, hot glued felt cut-outs on the box, stuck a pencil in the bottom and cut out a hole for the bird to go in.Home, tweet home.
 Saturday, August 7, 2010
Pvc Pipe Play house
I finally got to this project. Thanks to Wintertree Design for her instructions. We modified it just a little. We made the connection from the roof to the cross connectors longer for a taller roof. I can actually stand inside it. We took old (repurposed-love it!) curtains and hung them around the side, they worked out really well.
 Lady actually hung a flashlight from the cross bar on the roof for a night light and she slept in it a few nights ago.
 We still need to add a front door and some details. Any ideas?

 Then we got to my son's loft bed. This was completely constructed from our own plans, so we made it up.
 Talk about a custom house. It will eventually be a fort.
 My son actually cut the pipe himself. He loved it.
 Great summer time project.
 We took old (repurposed-love it!) curtains and hung them around the side, they worked out really well.
 Lady actually hung a flashlight from the cross bar on the roof for a night light and she slept in it a few nights ago.
 We still need to add a front door and some details. Any ideas?
 Then we got to my son's loft bed. This was completely constructed from our own plans, so we made it up.
 Talk about a custom house. It will eventually be a fort.
 My son actually cut the pipe himself. He loved it.
 Great summer time project.
Subscribe to:
Posts (Atom)